DSLR Camera Tips for Photo Booth Owners:
Maximizing DSLR Camera Performance
Owning and operating a photo booth is like being the life of the party and the memory-maker all rolled into one. To truly shine, mastering your DSLR camera is key. Here are some playful yet practical tips for photo booth pros:
Breaking it down:
Camera Terminology
Before we start with the details of Troubleshooting Common Photography Issues some new Photo Booth Owners may be having, let's first understand the Camera Anatomy.
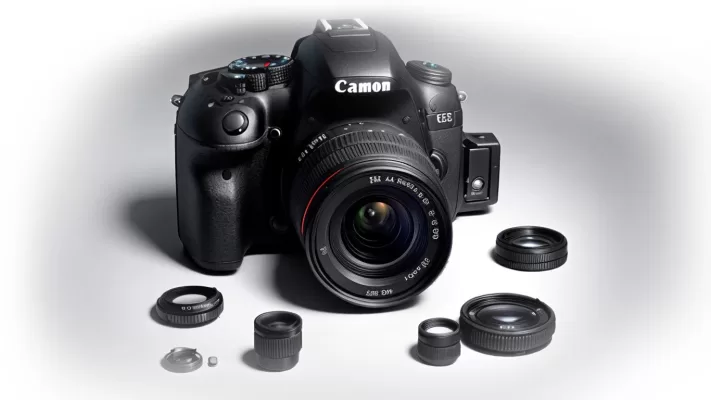
Camera Anatomy:
Lens: The lens is a crucial component that determines the quality and perspective of your photos. It can be changed to suit different types of photography.
Image Sensor: The image sensor captures the light coming through the lens and converts it into a digital image.
Viewfinder: DSLRs have an optical viewfinder that allows you to frame your shot by looking through the lens. This provides a real-time view of the scene.
Camera Modes:
Auto Mode: Suitable for beginners, the camera makes all the decisions regarding settings like aperture, shutter speed, and ISO.
Manual Mode: Gives you full control over settings. You adjust aperture, shutter speed, and ISO manually, offering more creative freedom.
the Exposure Triangle:
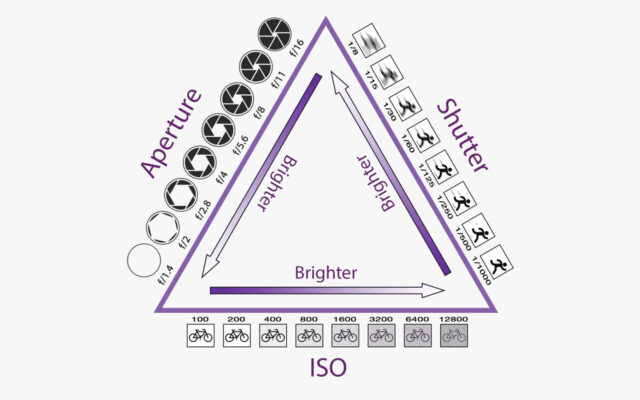
Understanding the exposure triangle for DSLR cameras is like mastering a three-legged stool: balance is everything! Keep these three in harmony, and you’ll be snapping perfect pics in no time!
Aperture: It controls the size of the lens opening. A smaller f-number (e.g., f/2.8) means a larger aperture, allowing more light. Aperture also affects depth of field.
Shutter Speed: It determines how long the shutter stays open. A faster shutter speed (e.g., 1/1000s) freezes motion, while a slower speed (e.g., 1/30s) captures more light and motion blur.Shutter Speed: It determines how long the shutter stays open. A faster shutter speed (e.g., 1/1000s) freezes motion, while a slower speed (e.g., 1/30s) captures more light and motion blur.
ISO: It represents the sensitivity of the image sensor to light. Lower ISO values (e.g., 100) are ideal in bright conditions, while higher values (e.g., 1600 or more) are used in low light.
Understanding Focus: A Key for Photo Booth Owners
Getting sharp, well-focused photos is crucial for a photo booth.
Manual Focus
The camera does the work, trying to make your subject sharp.
Pros: Easy and quick; great for general use.
Cons: The camera might focus on the wrong thing, like Aunt Edna's hat instead of her face.
Auto Focus
You manually adjust the lens to focus.
Pros: Precision and control; perfect for fixed setups.
Cons: Requires a bit of practice; but once you get it, it's like riding a bike.
Why Photo Booths Recommend Manual Focus
Using manual focus for your photo booths can significantly improve photo quality. Here's why:
Consistency: Manual focus ensures the camera stays focused on the same spot, avoiding refocusing issues with different guests. For example, if guests are standing at various distances, auto-focus might constantly adjust, leading to blurry photos.
Control: You have full control over what part of the image is in focus. In a busy booth environment, auto-focus might lock onto the wrong subject, like the background instead of people's faces.
Speed: Manual focus can be faster in a fast-paced setting. Guests won't have to wait for the camera to hunt for focus, speeding up the photo-taking process.
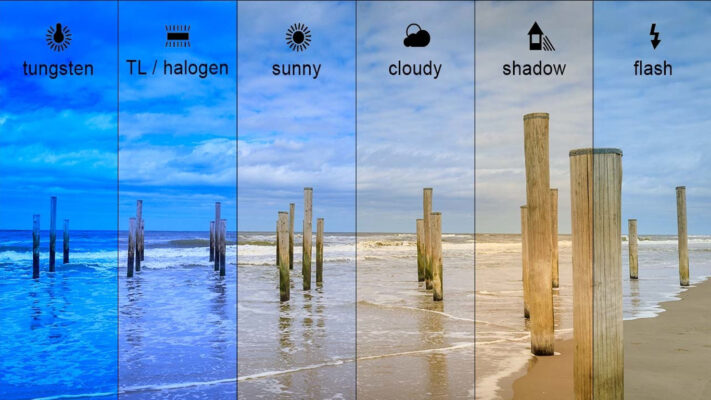
Understanding White Balance:
Essential info on white balance for your DSLR photo booth camera
Keeping Your Photos Real!
White balance is like the magic potion that makes your photos look natural, regardless of the lighting. So, next time you’re snapping photos at an event, remember to set your white balance. It’s the difference between looking like you’re on a sunny beach or stuck under a fluorescent light in a hospital!
Here’s a simple guide to help you out:
